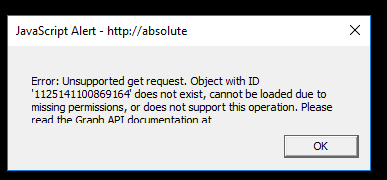
Hi guys,
My first post on this forum is going to be about Facebook Live Reactions Poll. If you payed any attention to 2016 US election on facebook you know what I am talking about.
What you need to accomplish this:
1.a script in order for peoples choice to be taken into account.
2.a streaming software.I recommend OBS Studio,its free and easy to use.
Steps to follow:
1) Create your Facebook Live Reactions Poll.
Head over to https://livereactionspoll.com/
You have a choice of 4 templates (at this moment),create you template and download it to your PC.
The file that will handle the reactions poll is index.html and you can edit it with notepad++.Save the file everytime you will make changes.
2) Generate your Facebook Access Token
If you’re familiar with Facebook API, you must be familiar with the process of creating an app on Facebook. It takes a few minutes and it definitely worth it. Then, you’ll be able to generate your own Access Token and ask for Facebook data.
Follow these 12 simple steps to generate your Access Token. https://smashballoon.com/custom-facebook-feed/access-token/
From my understanding facebook tokens are used to actualy updated the likes people leave on the live video.These acces tokens expire after some time,so always check this.
3) Set your Facebook Live
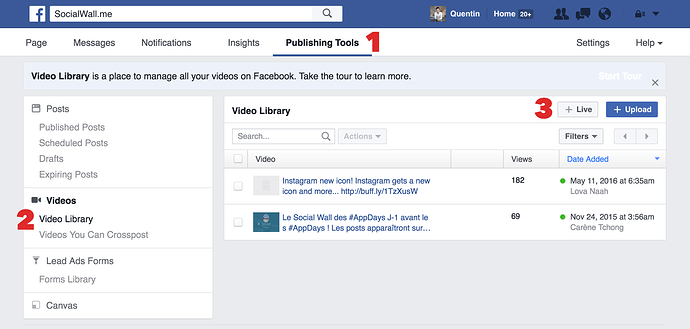
To go live, we will use the “Publishing Tools” on your Facebook Page.
Log on to your Facebook page and click on Publishing Tools in the top menu. Then click on Videos on the left menu. Then click on the +Live button on the top right.
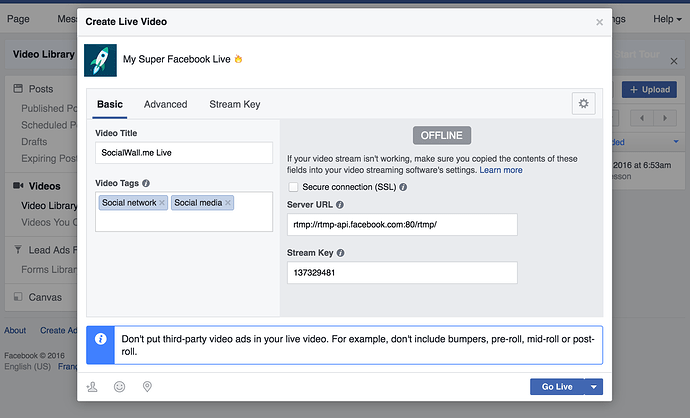
Then copy the stream key in the modal window that appears:
Important: The Server URL and Stream Key can only be used for a single Live preview/post connection. You must use the same URL and key to preview and post. That is, you cannot preview, stop the stream, and then resume at a later time. The URL and Key also expire 24 hours after creation or 4 hours within the preview.
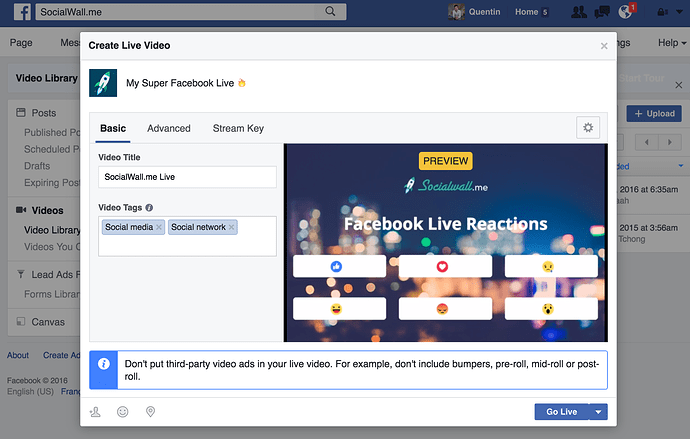
Click preview and fill in your update text and video information:
4) Configure your Livestream software
Here we go. Your Facebook Live is almost ready and now you need to set the livestream of your dynamic webpage. We will use a free software called OBS to make it happen.
a) Download OBS & install it on your computer.
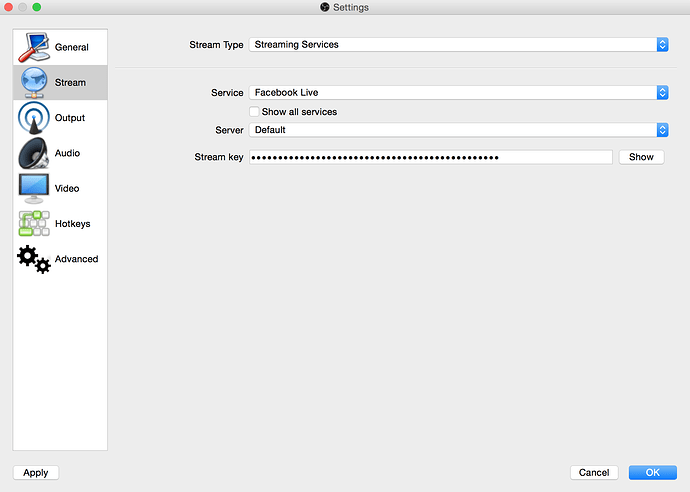
b) Click Settings in OBS and then click “Stream” in the left menu.
Select “Streaming Services” as the Stream Type and “Facebook Live” as the service.
Paste the stream key you obtained from the previous step (3) into the “Stream Key” box:
Click Apply and OK.
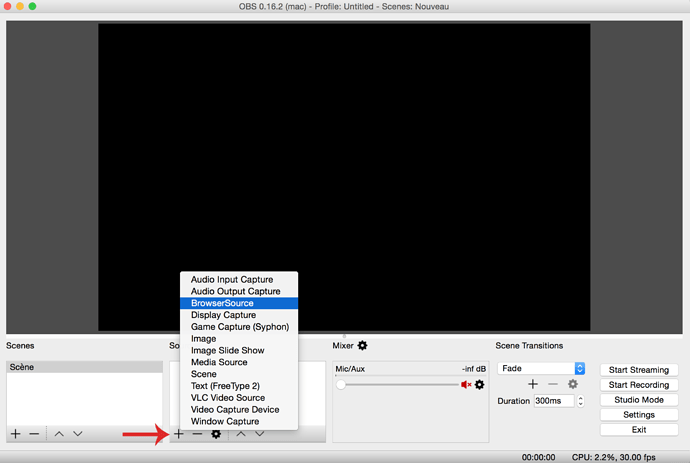
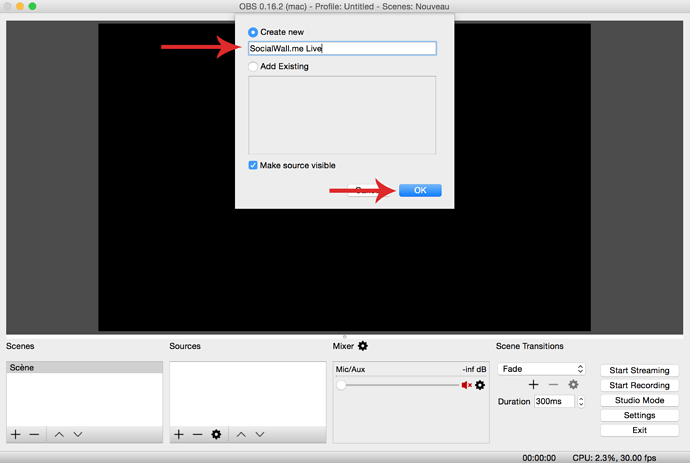
c) Add your source in OBS dashboard. Click on “+” > “Browsersource” > Create new.
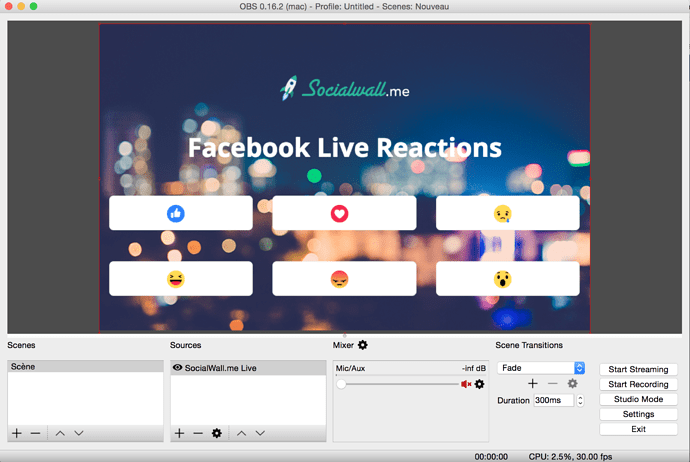
d) You’ll see a preview of your webpage. Resize it to make it fullscreen.
Click on “Start Streaming”.
5) Publish your Facebook Live
Go back to the Facebook Live pop-up window in your browser. After a few seconds, it should display “Fetching video stream”. And then after a few more seconds, you’ll see your webpage! Please note, there will be a 5-7 second delay in the stream. This is normal.
Important: Please note that we don’t know your Post ID yet. This is the LAST info we need to finish your index.html configuration. As soon as your post will be published, we’ll be able to get your Post ID and make the real time interactions work!
Publish your Facebook Live by clicking “Go Live“.
Now your video is posted, we can get the Post ID to track all users reactions.
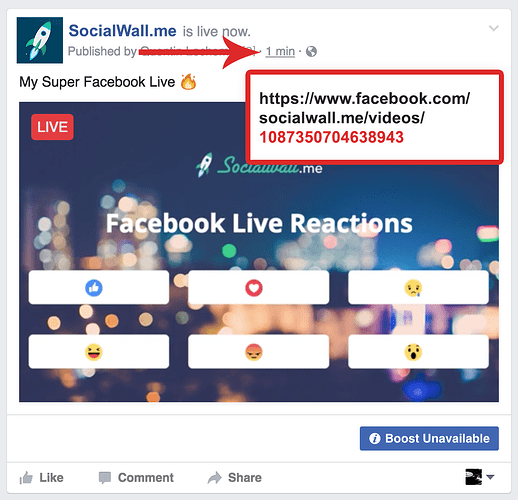
There are many ways to get the ID of a post. The easiest way is to visit your Facebook page, click right on the time link of your post > Copy link. The number displayed in the URL is your post ID. Paste this number in the “index.html” file on line that says “POST ID HERE”.
The post ID you must change everytime you want to go live,its different for every post,so never forget this part.Always SAVE the index.html file after you change something.
Now go back to OBS dashboard. Double click on your source. The source popup will appear. Click OK. It will reload your webpage with recent updates.
6) Make it public
Full credits for the tutorial goes to
Video tutorial
The youtube tutorial: https://www.youtube.com/watch?v=K__fqDb-Gsw
Cheers.

 .
.


