Do you intend to boost the revenue you generate from dropshipping? To optimize your earnings, continue reading to learn how to start setting up several Amazon stealth accounts.
Creating numerous accounts is one surefire way in order to safeguard your store and boost revenue. By splitting your orders (especially those with a high volume), having multiple accounts lowers the possibility of overloading. Account lockout and closure may result from overloading the account with too many orders. This is due to the fact that one Amazon account can no longer handle a large volume of orders. With this, you will have more sales to make if you have the chance to fulfill more orders.
Read on to know more about the step-by-step process of building multiple Amazon accounts from scratch.
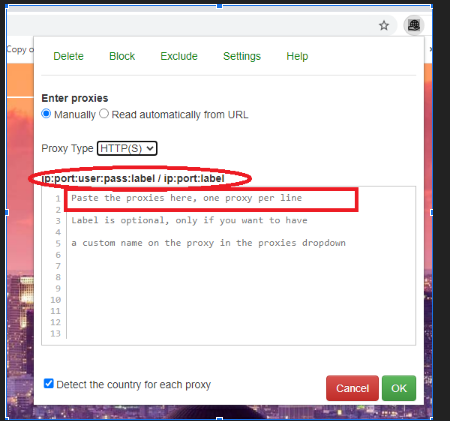
- The first thing to do is open Google Chrome and add the extension called BP Proxy Switcher and connect the proxy. (Please note that we highly recommend warming up each Amazon account on an individual server. You may visit this site for your reference:https://greencloudvps.com/ However, please feel free to use the Virtual Private Server of your choice.)
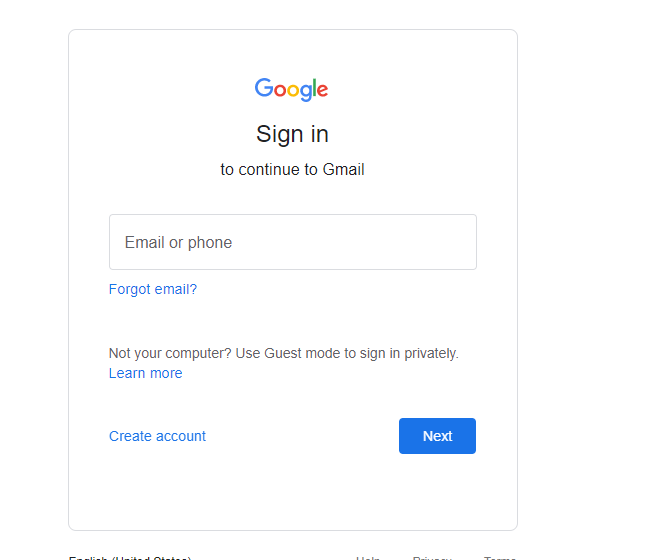
- After the confirmation of being connected, log in to the Gmail account you will use to register an Amazon account. (If you are planning to make multiple Amazon accounts, you may opt to buy gmail accounts from a third party supplier as creating them from scratch and making Amazon accounts from newly made Gmail is not recommended.)
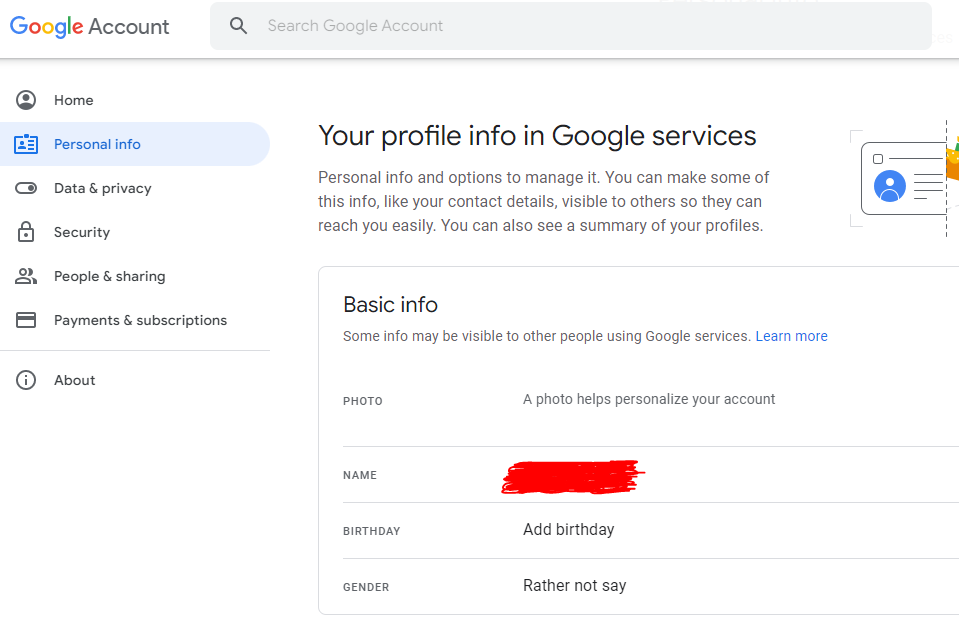
- Change the name, gender, and password of the Google account. (Since this is a creation for stealth accounts, you can use personal information from randomly generated names. You may use this website as reference: Random Name Generator - Behind the Name)
- Next, go to Amazon.com.
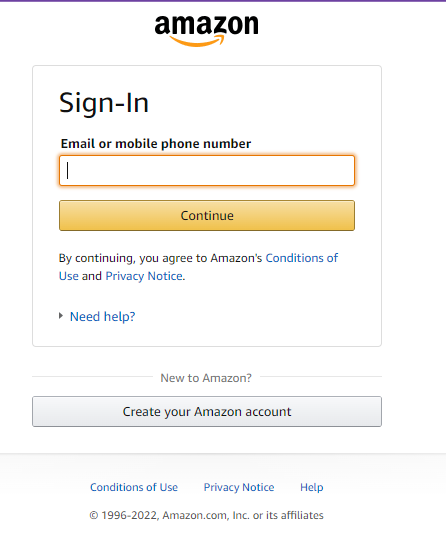
- Click to create your Amazon account. Input the same email address that you used for your Gmail and then create a password. Verify your email address. Write the exact name you used in your Gmail account for uniformity between your Amazon and Gmail. This way, we can lessen the chances of being flagged for inconsistencies of information.
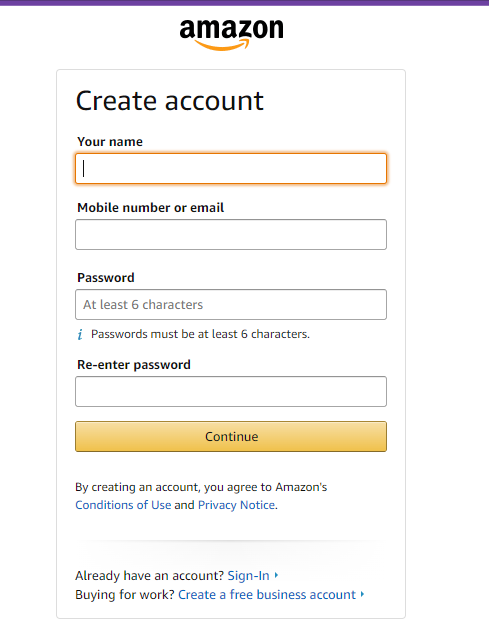
- Once you logged in, go to your account and click “your address” then add. For addresses, you may also use this website: https://randommer.io/random-address

WARM-UP STAGES OF THE ACCOUNT
DAY 1 - Create the Amazon account and add necessary information.
- Add your phone number and physical address.
DAY 2 - Start browsing on Amazon.
-
Look for random items that you can add to your cart/list.
-
Do this for 3-5 items and add them to your shopping cart/list.
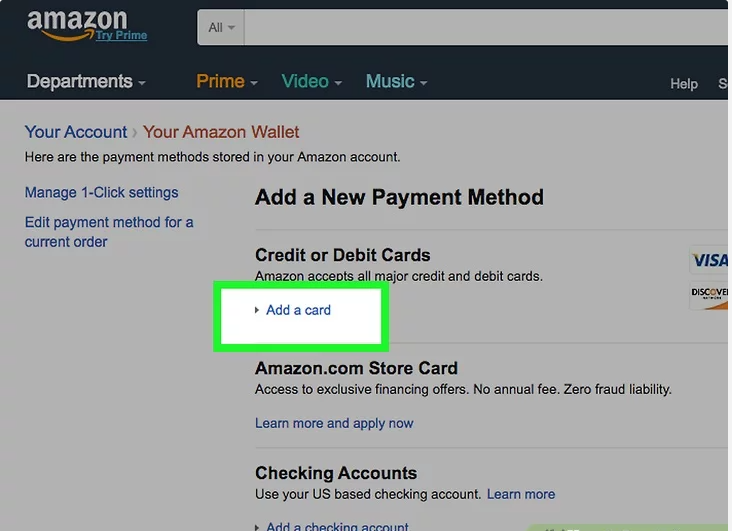
DAY 3 - Add your billing information.
- You will need to enter a credit card, debit card, checking account, or gift card so that you can pay for your purchases.
- Click “Your Account”.
- Open the “Manage Payment Options” link in the payment section.
- Click “Add a payment method”.
- Choose the payment method you want to add, such as a credit card.
- Enter your payment information.
- Confirm your entry.
When done warming up, you can now begin buying products. Nevertheless, we highly recommend that you start buying one product on the very first day of the purchase then increase the number of products as days pass by.
Reminder: While doing the tests for the creation, we noticed that some countries of origin for Amazon accounts require ID card number (national ID/passport) for verification when placing orders and they will cancel the orders in 48 hours once you fail to comply. Hence, it is very important to prepare for this ahead of time.
Should you have comments/suggestions/recommendations, feel free to comment down below.