hi guys,
anyone use this mobinet.io ?
Below we will explain how to quickly and easily create and configure your proxy on our service
Add the device to your personal account
Just three steps:
- Download the Mobinet app and install it on your device;
There are several ways to do this: download the APK file from mobinet.io or find our app in the Play Market (there is a link and a QR code on the mobinet.io).
-
Launch the app and copy the six-digit code; From now on, we are done with the device, every next step will be in your personal account on the site.
-
In your personal account on mobinet.io find and click the ADD DEVICE button and enter the six-digit code in the field that appears.

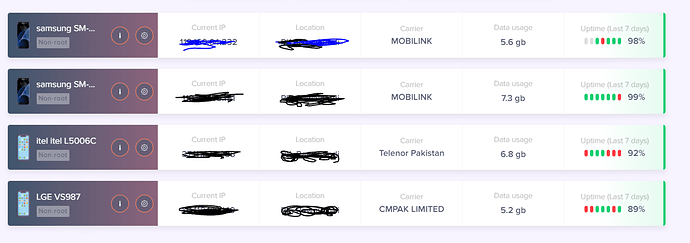
After that, your device appears in the MY DEVICES section panel.

Add proxies to the device
To do this, use the ADD PROXY button, it can be found in the DASHBOARD or MY PROXIES section, which opens the new proxy settings window.

In the settings window, specify:
- Proxy assignment: for me or for share (for another mobinet user);
- Proxy name, any convenient for you;
- The device the proxy will run on;
- Traffic limit: daily or total (optional);
- Proxy lifetime (optional);
- Authorization method and identification data (login / password or whitelist);

If you have selected For share, you need to additionally select:
-
Will the proxy be put up for sale in our marketplace (Select “On” in the “Add offer to Marketplace” section and indicate the price of the proxy in $, @ telegram or phone number for communication);
-
If you decide not to place a proxy in the marketplace (for example, if you found a buyer by yourself) - select “Off” in the “Add offer to Marketplace” section and specify the Username of the mobinet user that the proxy is intended for;

The configuration ends with the appearance of a ready-to-use proxy in your personal account.

Configure proxy IP address update
Attention! You can only configure IP rotation on a rooted device!
Open the device settings in the MY DEVICES section and activate the IP rotation.

Choose the rotation type: Manual) or Auto (on a timer). For the Auto option, you need to choose the frequency of the IP address change.

Manually updating IP proxies is possible via API. To use this option, go to the MY PROXIES section and click the API button next to the desired proxy, the link for changing IP will be copied to the clipboard

Configure custom DNS for proxies
By default, all Mobinet proxies are configured with the DNS address that corresponds to the proxy server itself.
You can also customize the DNS for each single proxy.
To activate custom DNS, turn the DNS parameter switch to the “On” position.
After that, in the drop-down menu, select one of the popular public DNS or enter the desired IP manually.

Device replacement
It may happen that you need to replace the device, leaving the proxy on it unchanged. This can be useful, for example, when a device that already has a large number of proxies installed fails. To use this feature, click on the device replacement icon in the available devices panel.

Enter the six-digit code of the new device in the field, after that all proxies are transferred to the new device without data loss and continue to work on it.
We hope that this guide will be useful to you
See you at mobinet.io!

