Hi guys, Considering the huge request on 4g & residential proxy i thought it would be great sharing with you this method of making residential proxy it’s vey easy nothing complicated. As everyone in instagram marketing knows, that handmade proxies are th best and tend to work better and give more trust to the account.
So in this thread im going to show you how to create your own residential proxy using Raspberry PI & your home internet. Enough talk let get into the steps.
Requirements:
- Raspberry PI (i highly recommend to buy raspberry 3b+)
- Mini SD Card
- Micro USB Cable/Power Block
- Monitor
- Keyboard
- Mouse
- HDMI Cord
- Access to your home internet router
First before we start you need to install operating seystem on raspberry pi, follow the instructions in the video below
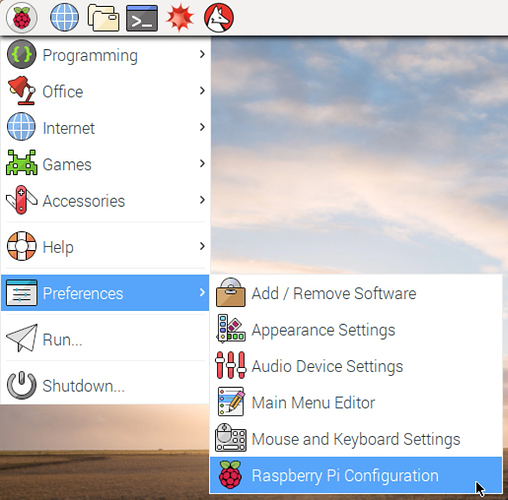
After you finished installing the Raspbian on Raspberry PI and rebooting the system. Go to Preferences > Raspberry PI Configuration > Interfances and enable SSH.
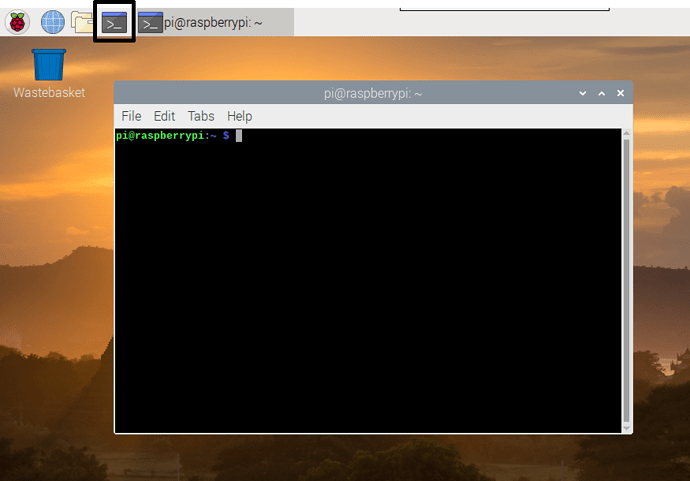
Now, we need device ip. To do it, open the terminal on Raspbian > type ifconfig and copy the device ip (it’s something like 192.168.1.12)
We need now to install WinSCP
https://winscp.net/eng/download.php
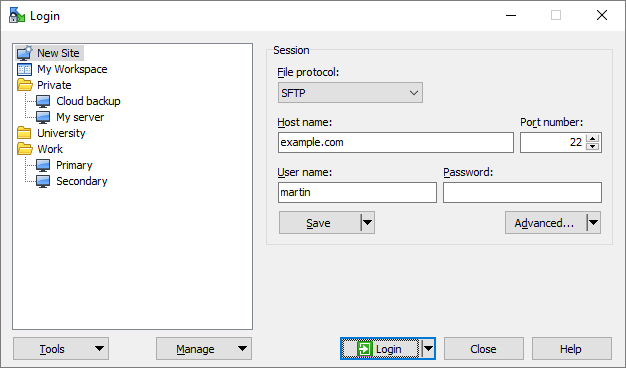
After you installed WinSCP open it and past the device IP we copied before in host name and type-in your prefered username & password then click on “login”
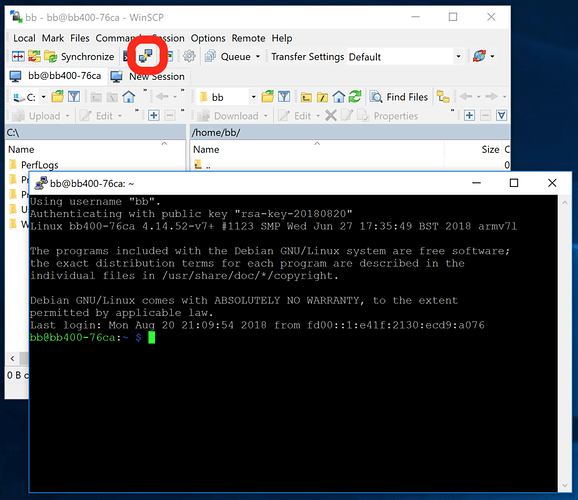
Open the terminal on WinSCP ( its better to watch tutorials on how to use WinSCP )
Copy & Past the following commands one by one: ( if any y/n question showed-up just press y and enter)
- sudo apt-get update
- sudo apt-get install squid3
- sudo apt-get install apache2-utils
After you completed entering the commands above, type-in:
- sudo su
- chmod 777 /etc/squid/squid.conf
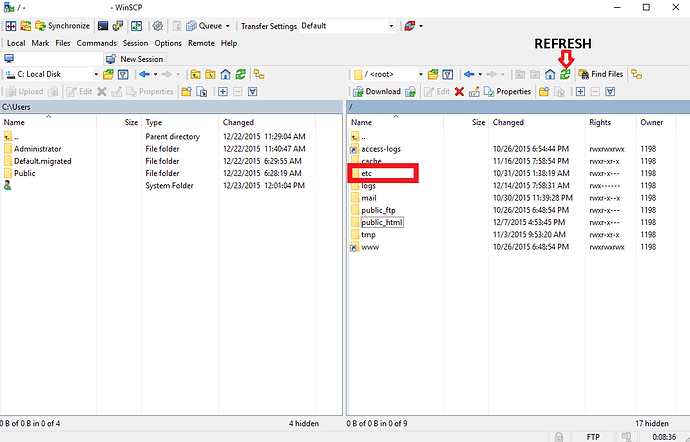
Now go back to WinSCP, on the right side search for folder with the name “etc” open it then scroll down to “squid” open it then open file “squid.conf” and delete everything inside it “CTRL+A Delete” > Copy & Past the new config from here: https://github.com/serverok/squid-proxy-installer/blob/master/squid.conf > Change the http_port to 3230 > Save the file. Click on refresh to make sure the file is saved!
Go back to the terminal to create username and password for the proxy, just past the code below and replace USERNAME_HERE and PASSWORD_HERE with your desired user name and password.
- /usr/bin/htpasswd -b -c /etc/squid/passwd USERNAME_HERE PASSWORD_HERE
When you have done creating username & password for the proxy type-in sudo service squid restart After done restarting type-in server squid status to make sure everything is OK
We need now to create port-forwarding, to do that go to your router panel > port forwarding > add new custom port > name it what ever you want, for the port we going to use 3230, the device select raspberry pi and click apply. ( if you dont know how, searche in youtube how to open port-forwarding on your router model)
Voila! you have created your first residential proxy. Now we need to check the proxy if is working to do that you can use any proxy checker you prefer, for me i use fogldn proxy checker.
Go to google type “My ip” and you will see your public IP and this is the proxy IP.
your proxy details are like the following: your_public_ip:port:username:password
Hope you guys find this tutorial helpfull and forget to give it a heart  .
.
if you still have some questions or you didn’t understand something feel free ask below.


 but thank very much for this one already.