 LinkedIn Basics - Creating LinkedIn Avatar
 This is the perfect guide that will walk you through everything you need to know to get started, including how to build a stellar profile, make the right connections, use the platform effectively, and make your profile stand out from the crowd. Here’s how to get the most out of LinkedIn.
![]()
![]() You start with choosing the right supplier, where you can buy the account. After which, is connection - this is Day 0 wherein you will connect the account that you bought from the supplier to Jarvee BUT keep in mind that before you proceed to the next step you need to let the account rest for 24hrs. After completing the 24-hour rest, you will proceed to the warm up stage, this is considered as the highlight of the creation because here you will input all of the details that the account needs. Warming up will last for four (4) days and in this 4-day warm-up you’ll do adding phone numbers, profile photo, connections, liking pages, joining groups and hashtags. After doing the 4 days warm-up, you will do random accounts that include more following of pages, joining more groups, sending connection requests to people in the same niche as the account, starting conversations with people and posting on the wall. Also, the avatars information needs to be edited too, these are work experience, education, location, and summary.
You start with choosing the right supplier, where you can buy the account. After which, is connection - this is Day 0 wherein you will connect the account that you bought from the supplier to Jarvee BUT keep in mind that before you proceed to the next step you need to let the account rest for 24hrs. After completing the 24-hour rest, you will proceed to the warm up stage, this is considered as the highlight of the creation because here you will input all of the details that the account needs. Warming up will last for four (4) days and in this 4-day warm-up you’ll do adding phone numbers, profile photo, connections, liking pages, joining groups and hashtags. After doing the 4 days warm-up, you will do random accounts that include more following of pages, joining more groups, sending connection requests to people in the same niche as the account, starting conversations with people and posting on the wall. Also, the avatars information needs to be edited too, these are work experience, education, location, and summary.

 One thing is for sure, following all of the steps in the guide will lead you to a successful avatar creation. If you need assistance you can write to us or check directly the guide that we prepared.
LinkedIn Avatar Creation: A How-To Guide
Steps: How to CONNECT LinkedIn account
Day 0: Connecting the account/s
- Buy gmx mail from a trusted supplier (to make the account from scratch)
- Start connecting it to Jarvee and follow the steps below
- Go to SOCIAL PROFILES

- The click ADD PROFILES
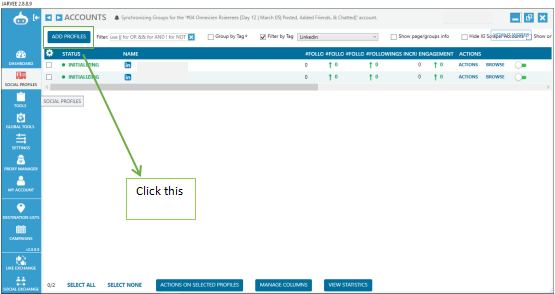
- You will be directed to this page then click ADD PROFILE (make sure that you’re adding profile under LinkedIn)
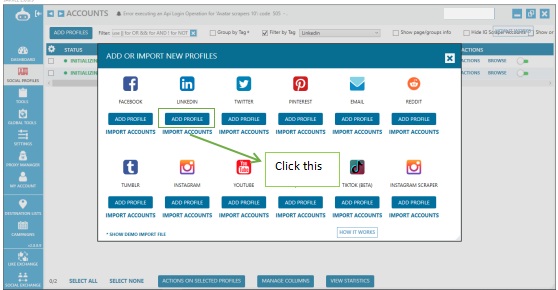
- It will look like this once you click Add Profile under LinkedIn
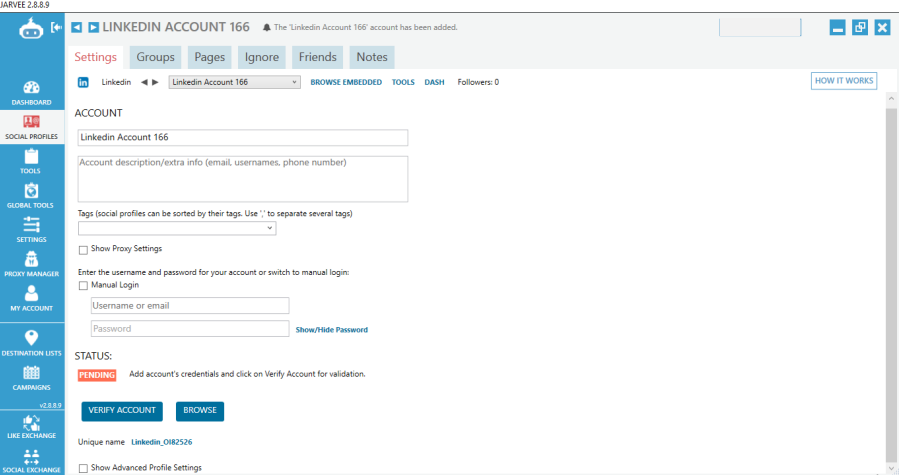
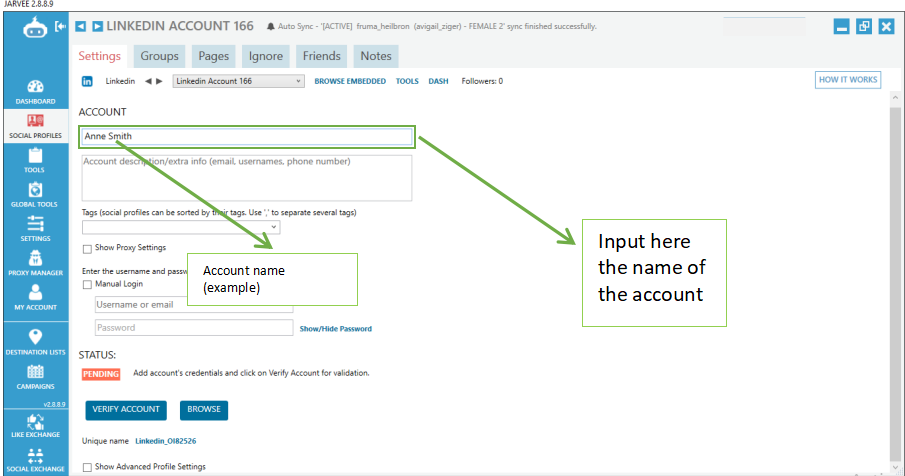
- Next is to change the account name, you have to input the account name in the box (see photo)
[For the accounts’ name you can search names on google or you can made up your own names for your accounts]
- Then input the credentials in the description box

- Input the USERNAME and PASSWORD
(There are also cases that the username is an email address)
[Username and password are the email address and its password]
[As you can see in the example the username is melanikova.94@gmx.us and the password is this JXP2C0A305s8Qu]
[ When you buy gmx mail the email address is the username and the following text is the password]
FORMAT: Username/Email Address:Password:
: melanikova.94@gmx.us:JXP2C0A305s8Qu:Nataliya:Melanikova

- Next, choose a tag for your account (See photo)
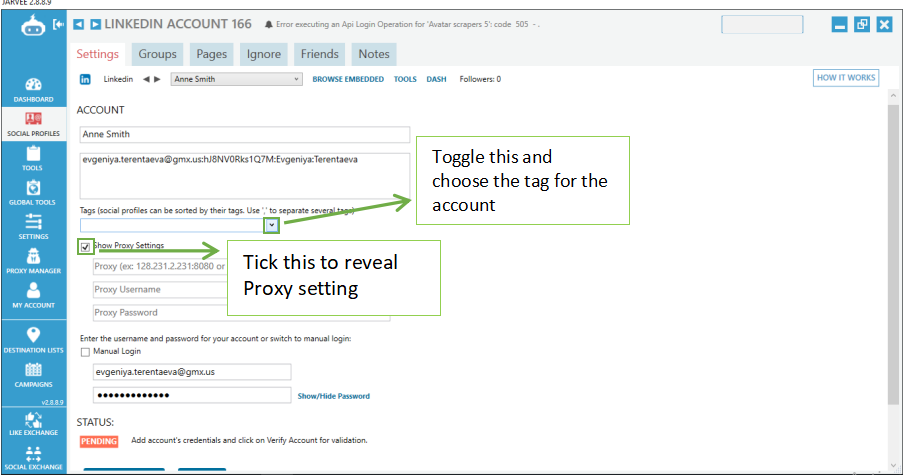
- Click the box to reveal the settings below and do the setup for the accounts’ settings (See photo and follow the instructions)

- Follow the instructions in the photo. Do it carefully
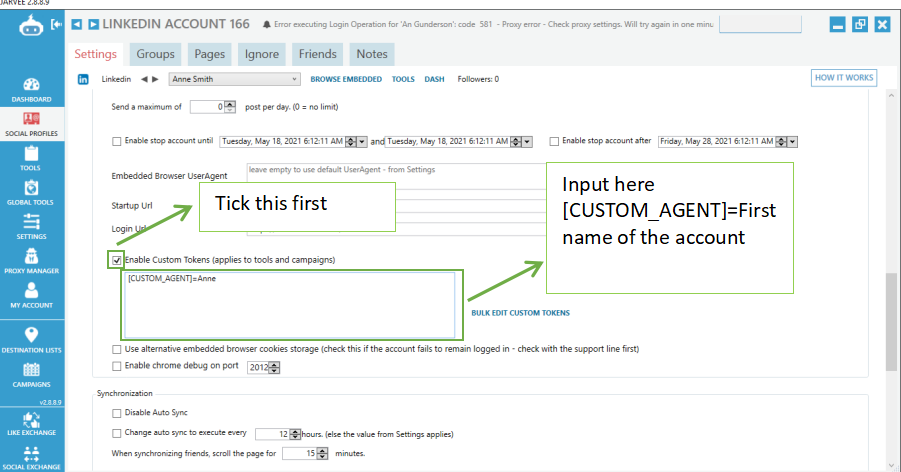
- Tick the box (make sure it has a check)
- Then, input the STANDARD TEXT on the box which is [CUSTOM_AGENT]=First name of the account
The example shows [CUSTOM_AGENT]=Anne

- Scroll down a little bit for the continuation.
- Copy paste the TEXT which is this [CUSTOM_AGENT]=First name of the account, then paste it again in the box (See photo)
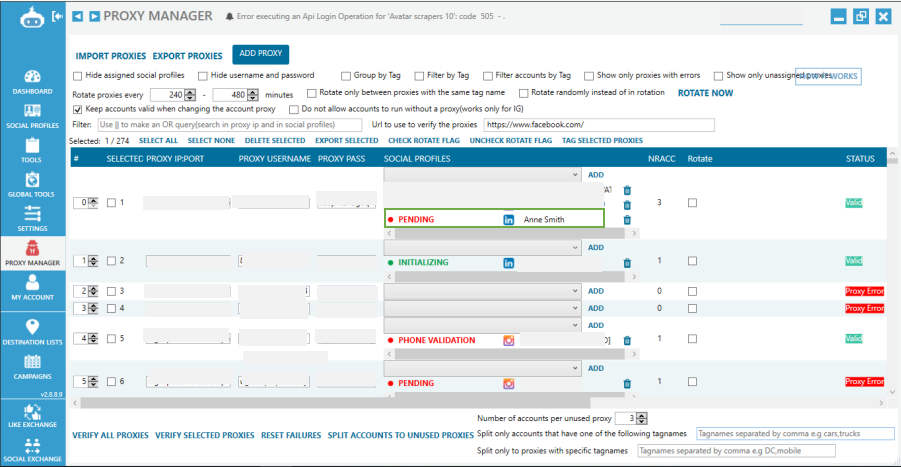
- After that, scroll up and go to PROXY MANAGER

- Time to add the PROXY
- Check first if the PROXY is valid (See photo)

- Make sure to follow the numbering in order to add the Proxy.

- The proxy has been added. As you can see it’s still pending so you have to make it a valid one.
- You need to go back to SOCIAL PROFILE to make the account valid

IMPORTANT NOTE: IT IS RECOMMENDED TO CONNECT ONE AVATAR TO ONLY ONE PROXY.
In layman’s term, proxies are protectors of your accounts from being flagged or disabled. It serves as a mask of your real IP address and acts as a unique IP address of your accounts (as we all know, having too many accounts connected to a single IP address is flagged as a suspicious activity. Hence, running your accounts without a proxy or a reliable one is a very dangerous step in starting automation.
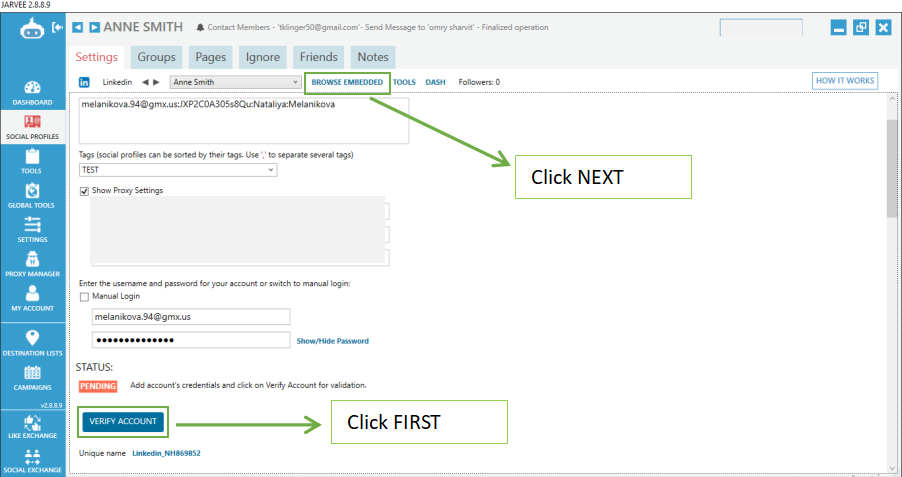
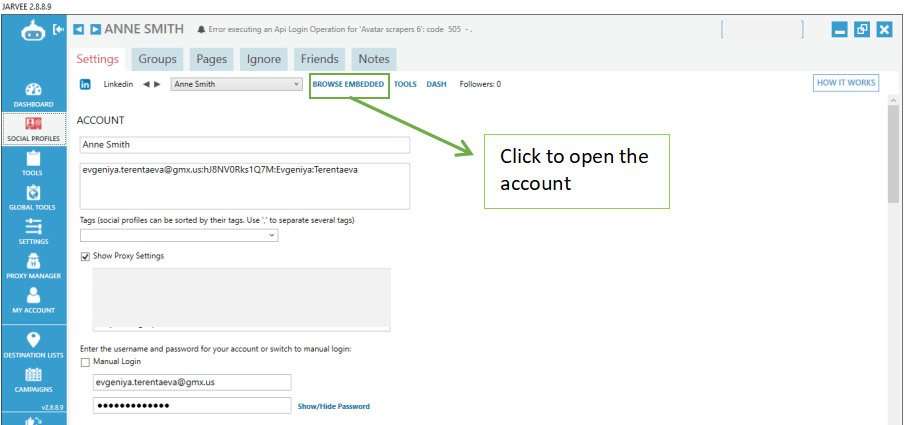
- Once you reached the social profile page look for the account that you connect (LOOK FOR ITS NAME) Then click it.

- Click BROWSE EMBEDDED

- So you will be directed here
- Next is to check if the EMAIL ADDRESS (it’s in the description box) is running or active
- You need to go to google first (See photo)
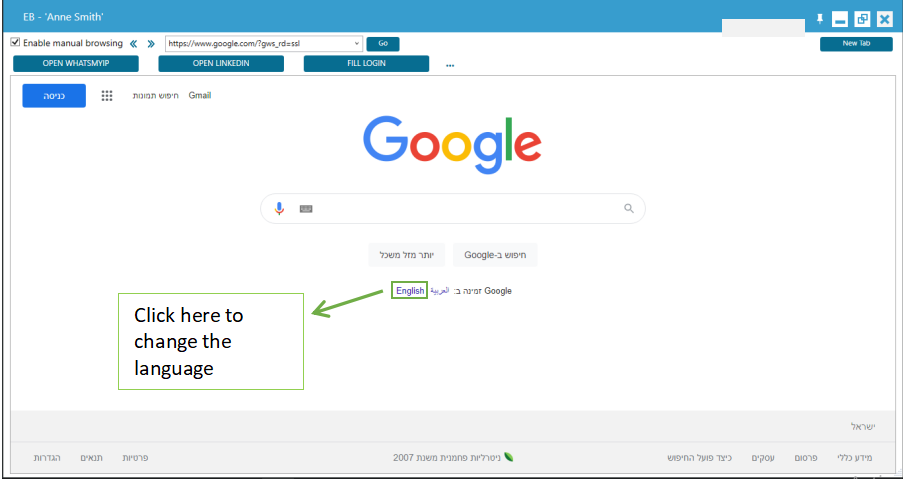
- Next go to gmx.com


NOTE: After clicking gmx.com (refer to the photo above) if there are ADS on screen before you will reach the man page of gmx just press X or find the X/Cancel button

- Input in the box the EMAIL ADDRESS (the one used as username) and it’s PASSWORD

- You will be directed to this page after clicking LOG IN

This is an indication that the Email Address is active or running
[It is important to check if the email address is active so that you can use it in building your linkedin account. Once the email address that you’re using in building your account is blocked or not active you cannot use it and you cannot access the Linkedin account as well]
- Next step, go to LinkedIn page to register
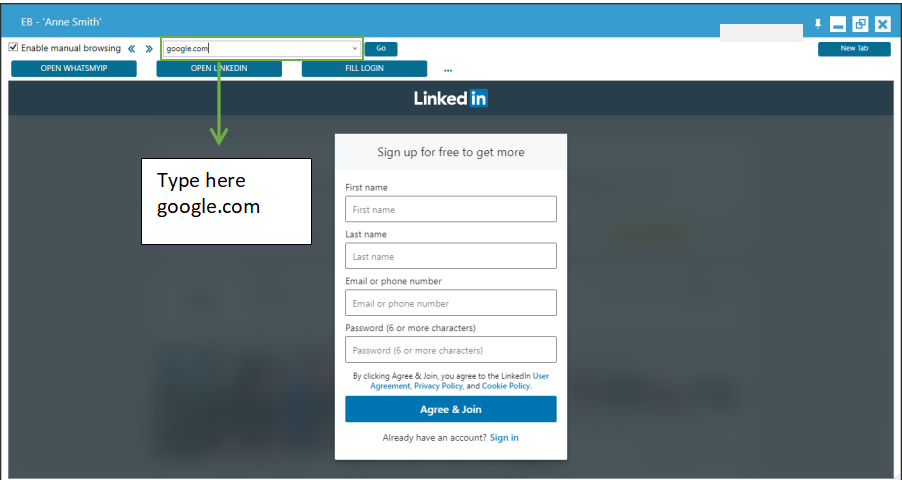
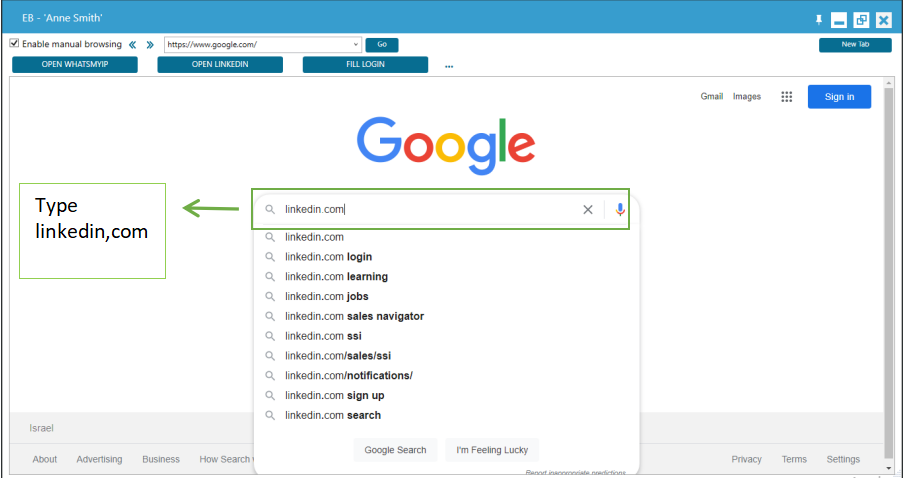
- You have to go back again to google

- Type linkedin.com in the search box

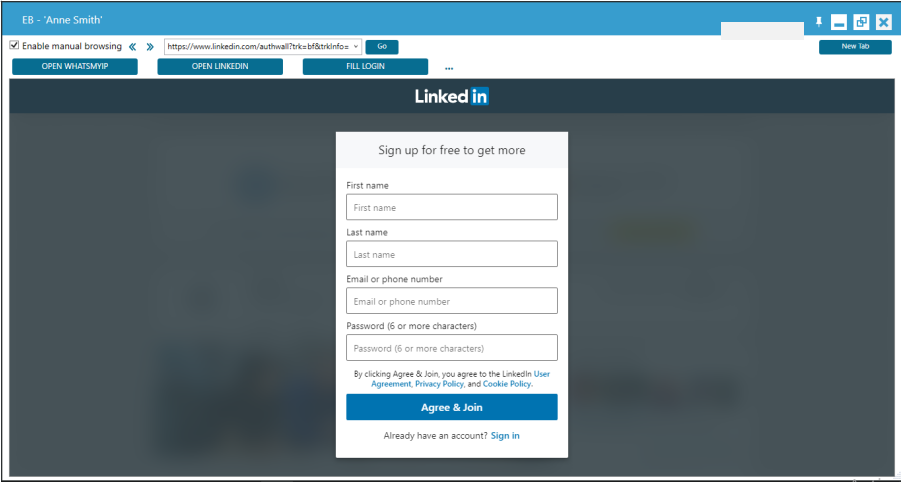
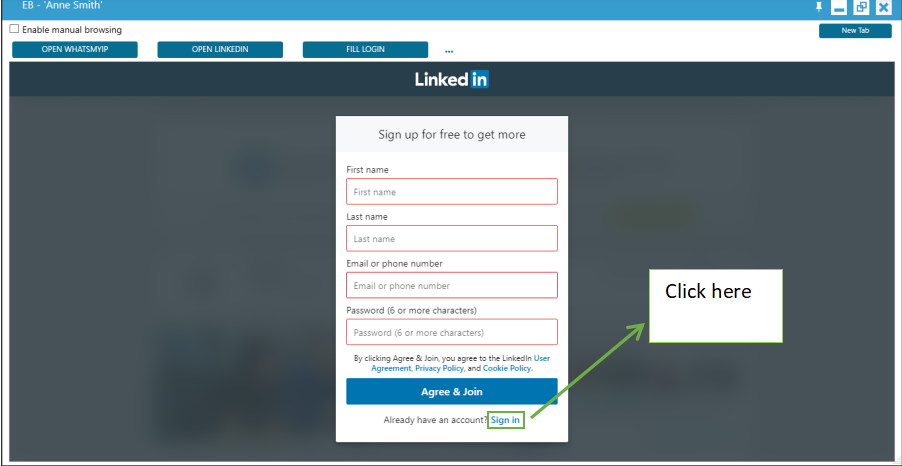
- If you’re already in this page, click SIGN IN
- After that, place the first name, last name, email address, username as well as the Password for signing in, then click AGREE and JOIN

- Once you already click AGREE and JOIN, you will proceed to this page
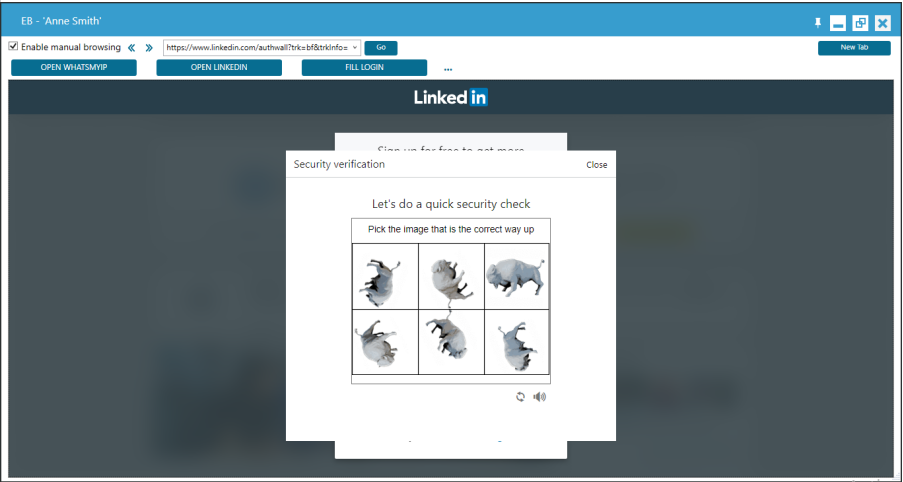
There are tendencies that you will do CAPTCHA or something like this. Try to answer/solve in order to get the security verification
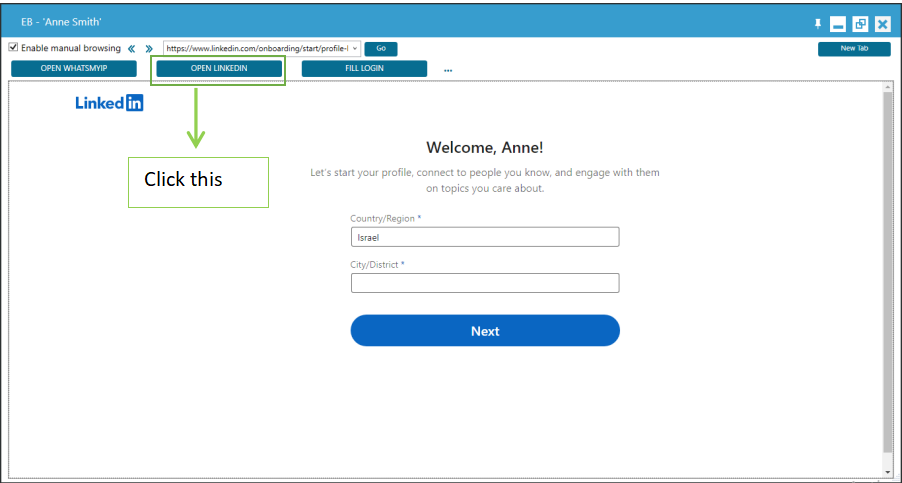
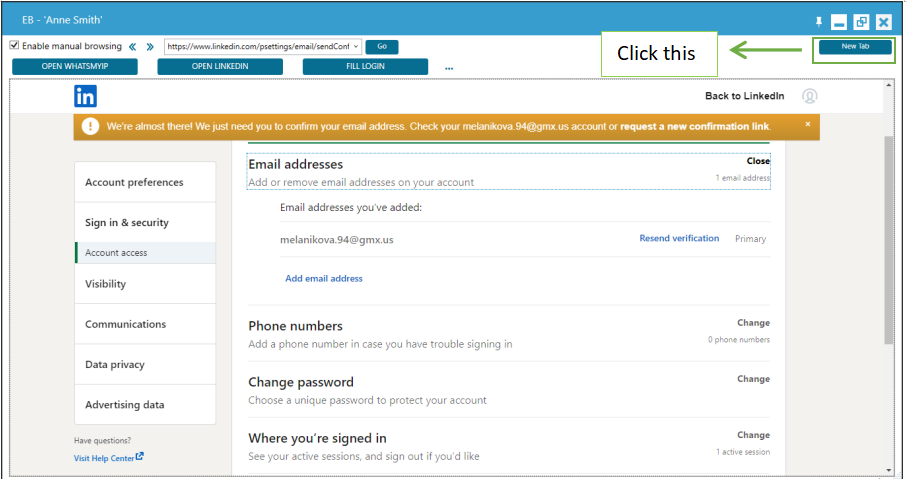
- You will be directed again to this page and click OPEN LINKEDIN (See photo)
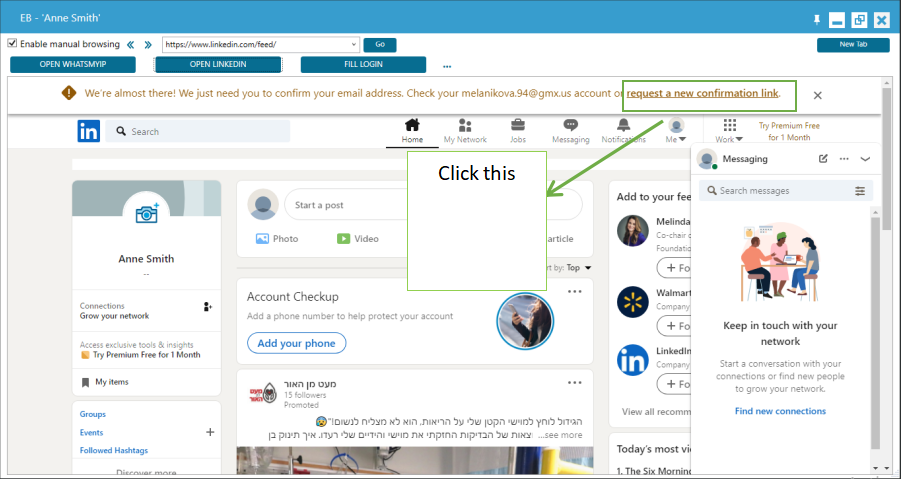
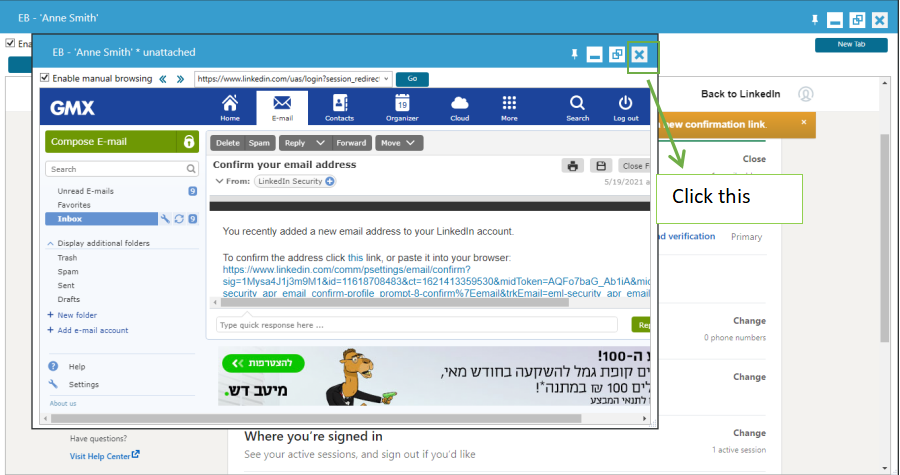
- Now let’s verify the email address. To verify, you need to click REQUEST A NEW CONFIRMATION LINK (See photo) to request a confirmation.
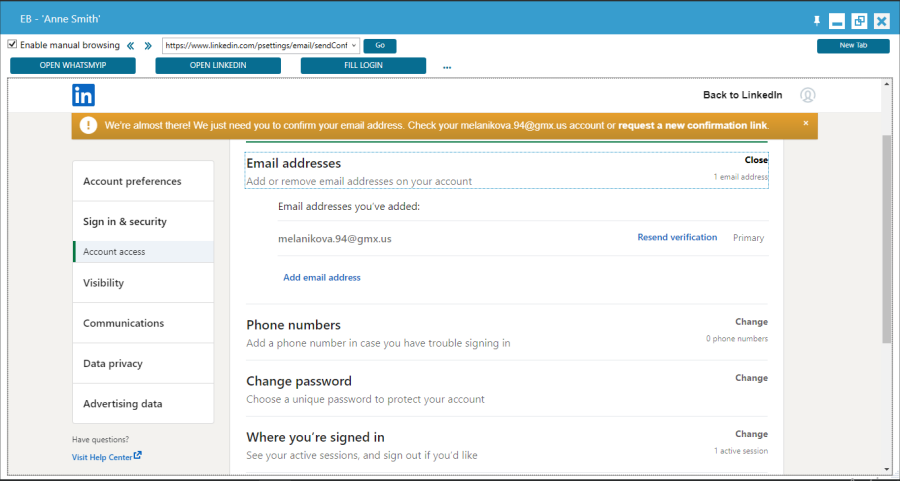
- It will look like this after you request for a confirmation link
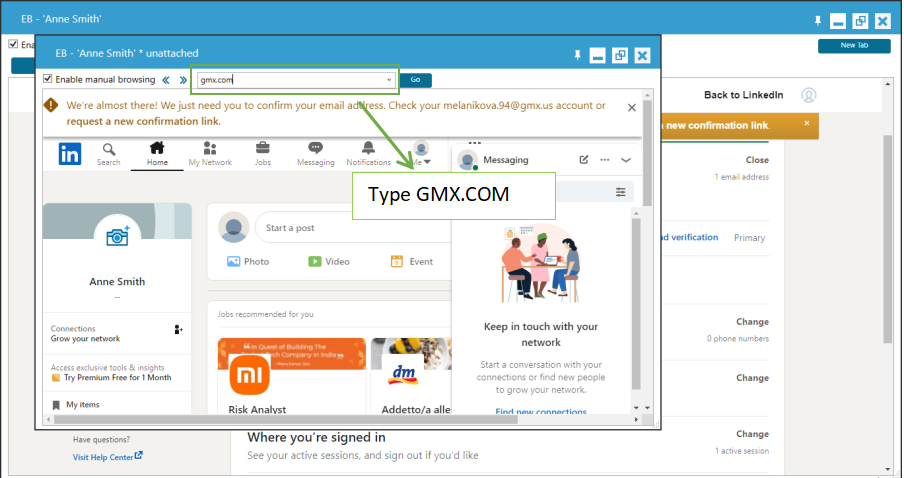
- Next, you will go back to GMX.COM for you to confirm the email address being used.
- Click NEW TAB (See photo)
- Then, type GMX.COM in the search box
- Click LOG in, then input the EMAIL ADDRESS and PASSWORD then proceed

- Click the message to open
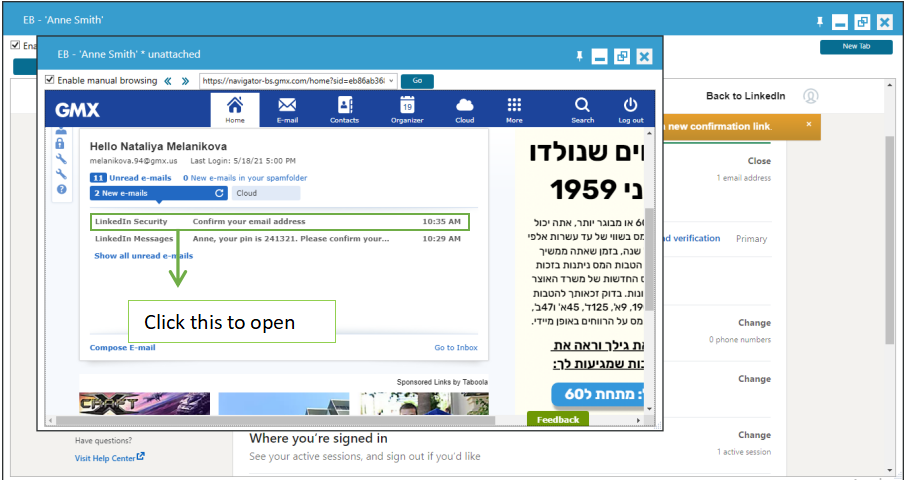
- To confirm the email address, follow the instruction below (See photo)

- When you’re already in this page, you need to wait for a couple of seconds

- Now it’s already VERIFIED. Follow the instructions below for the continuation
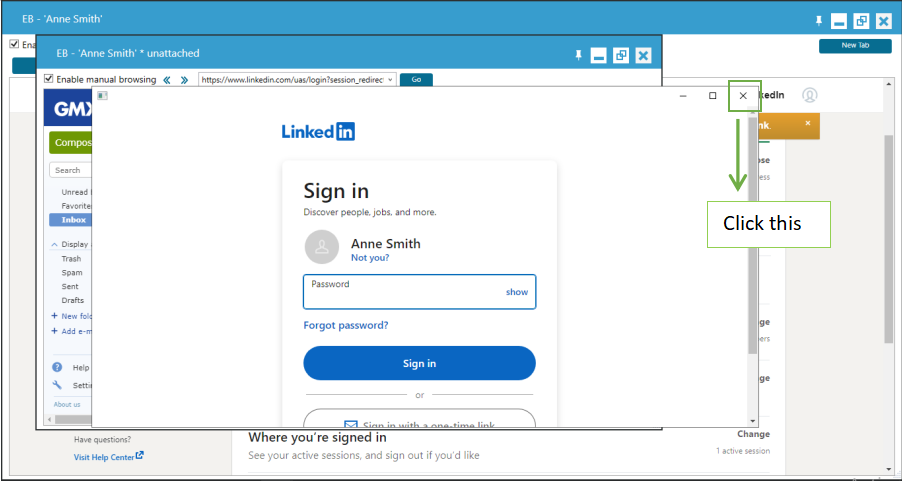
- For the next step, you need to make the account VALID (because it’s still on a pending status). To do that, you need to click VERIFY ACCOUNT and BROWSE EMBEDDED simultaneously ( click first VERIFY ACCOUNT then click immediately BROWSE EMBEDDED).
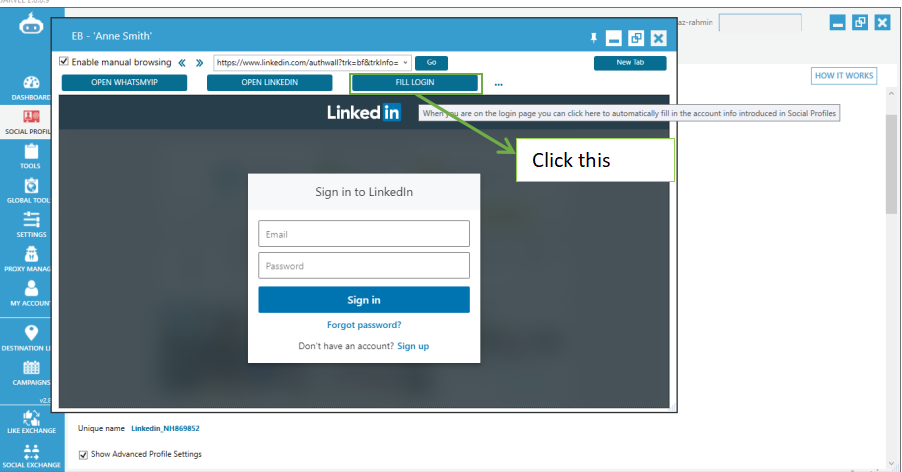
- Click SIGN IN to proceed

- Then, click FILL LOGIN and wait for the boxes to be filled. (It will be filled automatically)
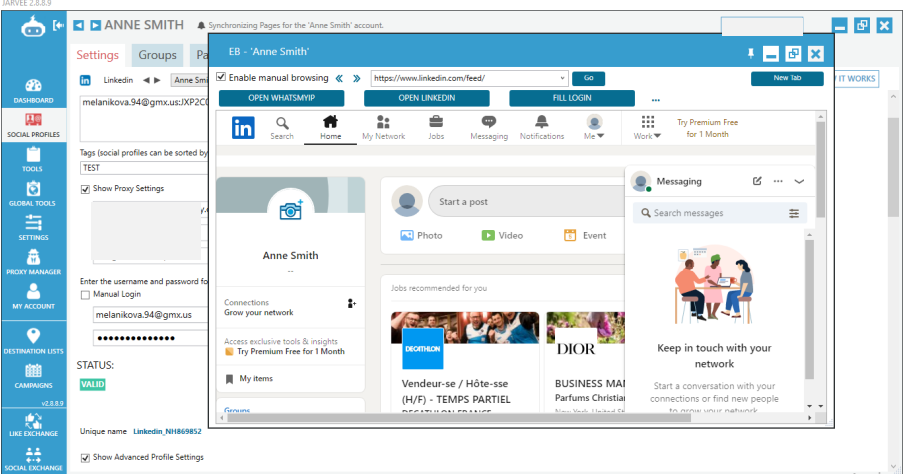
- Then that’s it. The account is already good and as you can see it is valid
IMPORTANT NOTE: After you connect the account to the server, you need to make it rest for 24hrs.
Steps: How to WARM UP an account on LINKEDIN
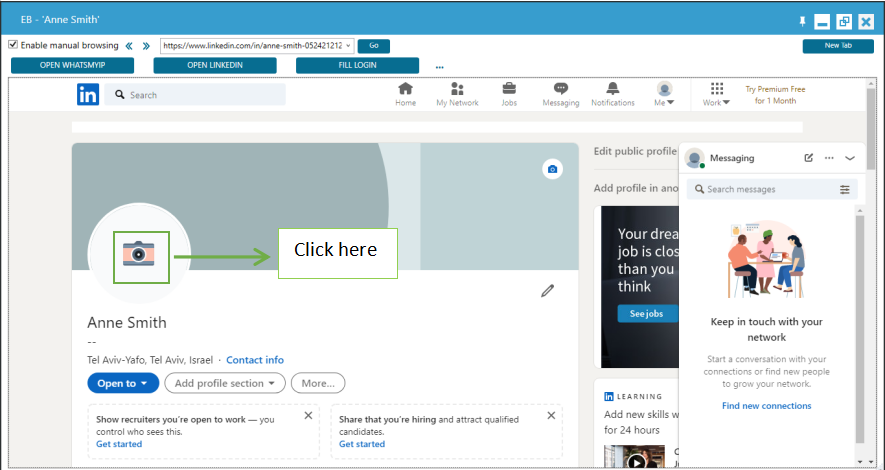
Day 1 - Adding of Profile Photo
- First is to click BROWSE EMBEDDED, to open the profile
- Next, go to your computer and go to the folder where you saved your assigned profile picture to your account and RENAME it. (To avoid confusions and repeating of using photo)
[We recommend https://thispersondoesnotexist.com/ in getting random photos for your LinkedIn avatars]

Additional Info
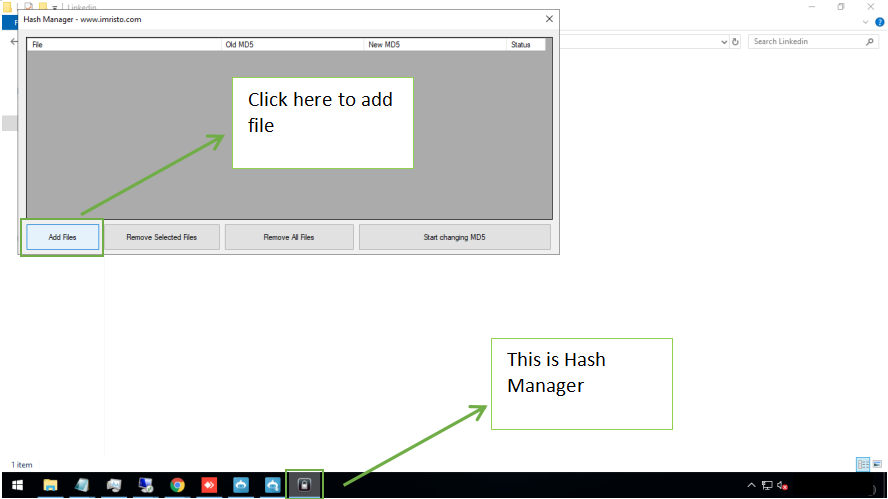
- You need to HASH first every photo before you use it. Use the tool HASH MANAGER. Follow the instructions below on how to hash a photo
[You need to download from Google the Hash Manager app. In case you’ll find it hard downloading it, you can leave a comment if you wish to have a copy of the application]

NOTE: It is important to change the MD5 hash value as each file in the Internet has its own hash and since we just downloaded the picture from a website, others might have uploaded it already. Some sites do not allow the same files (same hash) to be uploaded more than once. Hence, we need to change the hash in the first place.
- Go back to the profile and click the camera icon
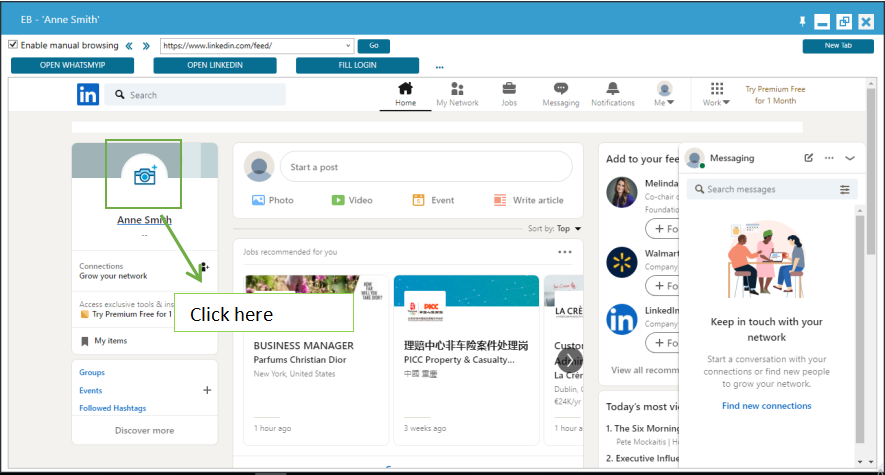
- Follow the instructions below:
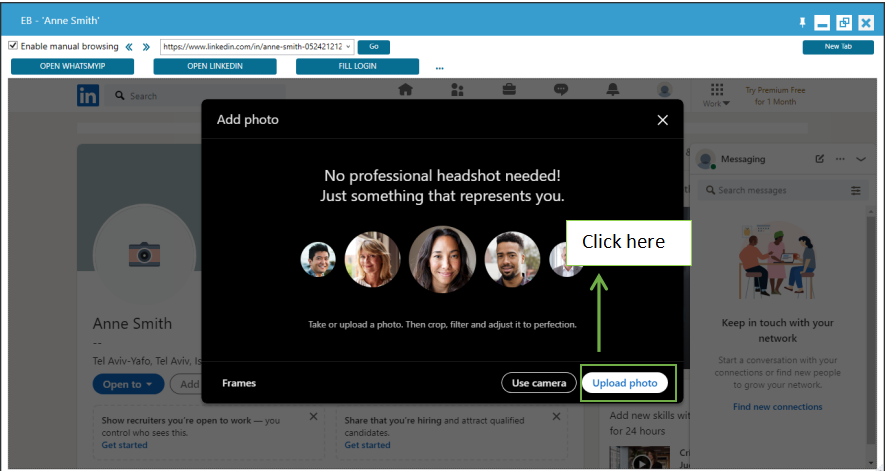
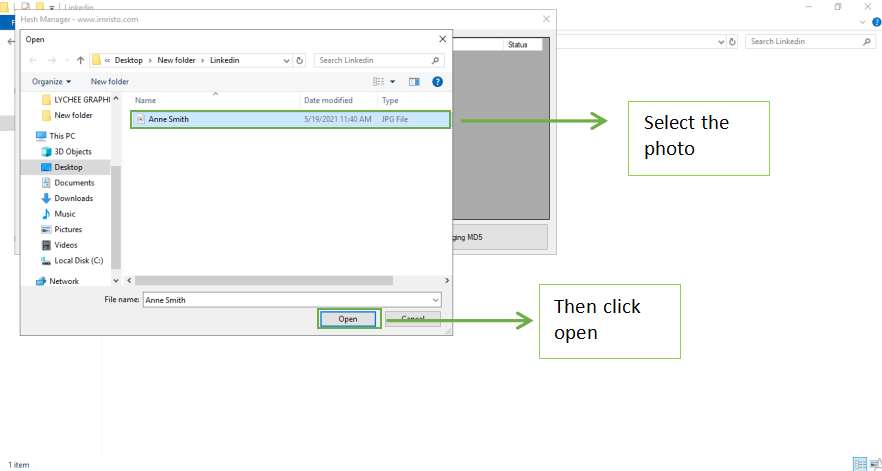
- Then select the photo

- Then upload the photo

- Now you have your accounts’ profile photo

Day 2 - Adding of Number
- Start by clicking BROWSE EMBEDDED to open the account
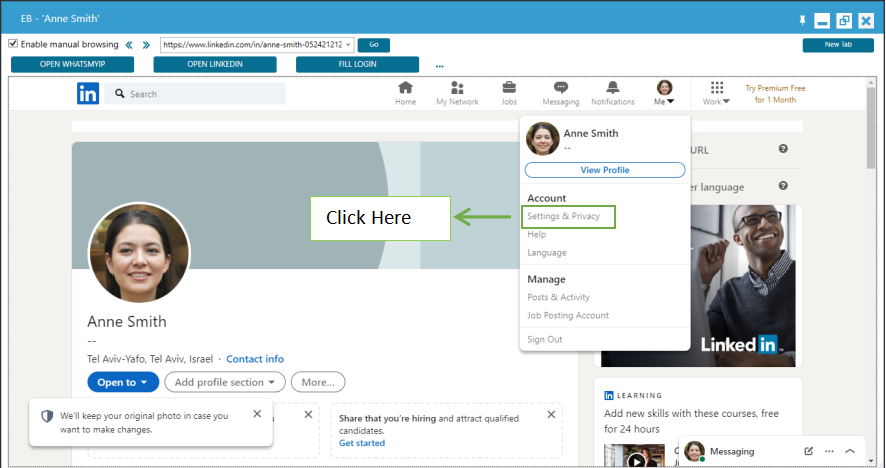
- Next step is to open settings to change the phone number

- Go to Settings and Privacy
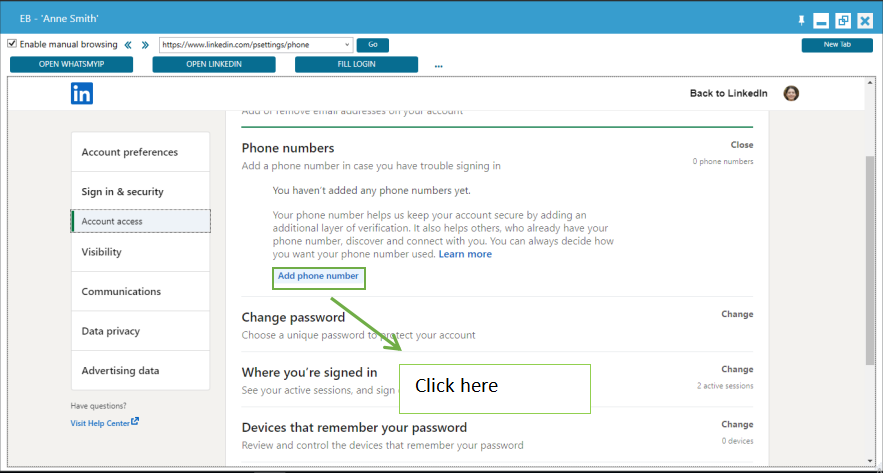
- Go to Sign in and Security

- Click Phone number
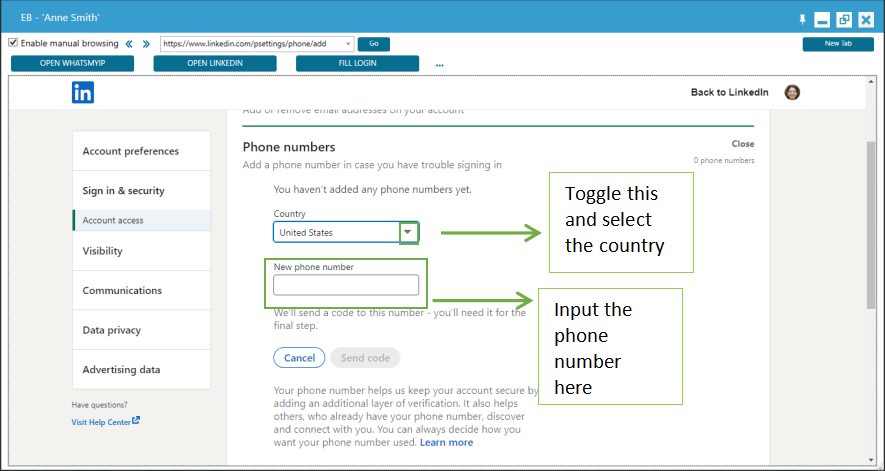
- Then click ADD PHONE NUMBER
- Select your country and add the phone number
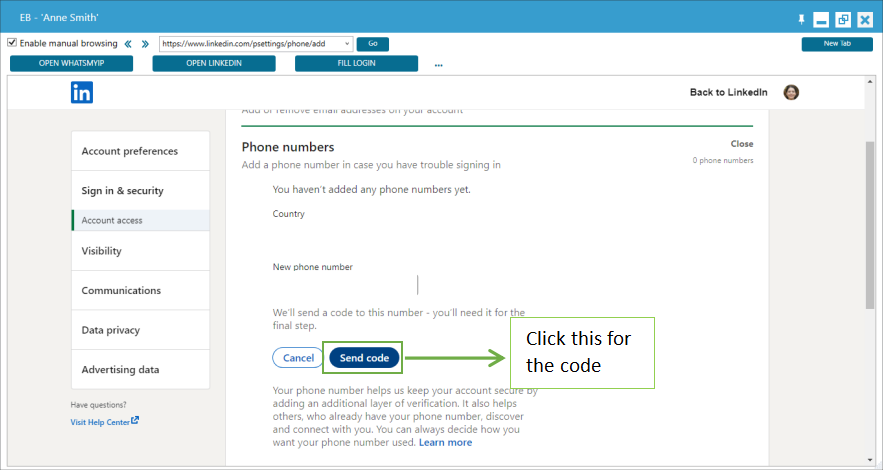
- After you input the phone number, you need to get the code for verification
- Click SEND CODE
- Input the PASSWORD of the ACCOUNT then click DONE

- If you have the code, type it in the box and click verify

Then the number will successfully be added
Day 3 - Adding of connections and joining groups
Adding Connections
- To start, open the account by clicking BROWSE EMBEDDED
- Go to the search box and search for connections
[Search and send connection requests to people in the same niche as the account]

- Then, click connect to send connections

Adding groups
- Search a keyword (make sure that you will click groups)
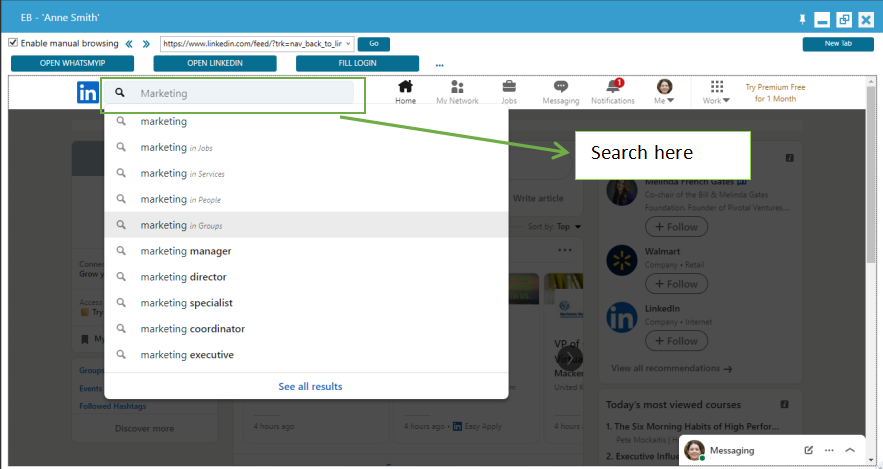
Example (It should be in GROUPS)
- You can select groups then click the name to join

- Then send request to join

Day 4 - Following pages and hashtags
Following pages
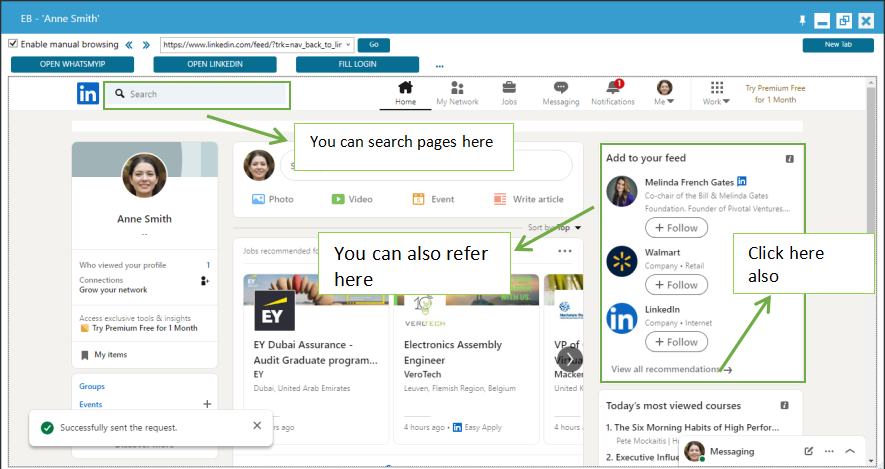
- You can search company pages in the search box or you can find pages on your feed as well. (See photo)
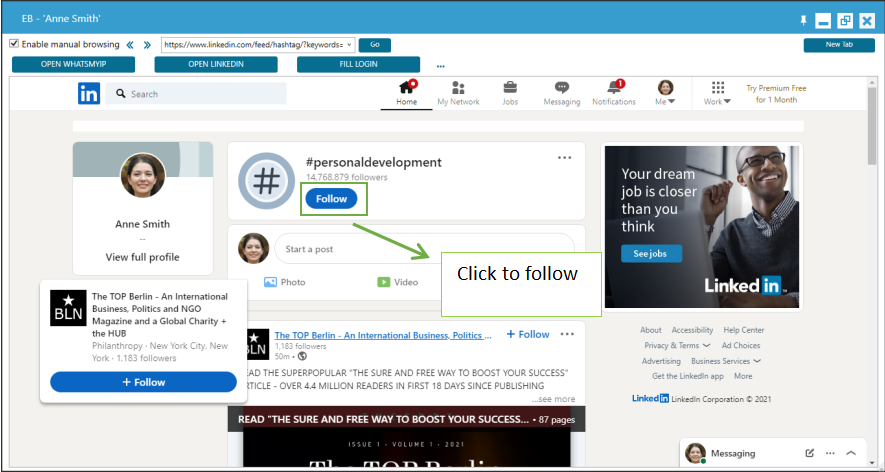
Adding Hashtags
- You can search hashtags too on the search box

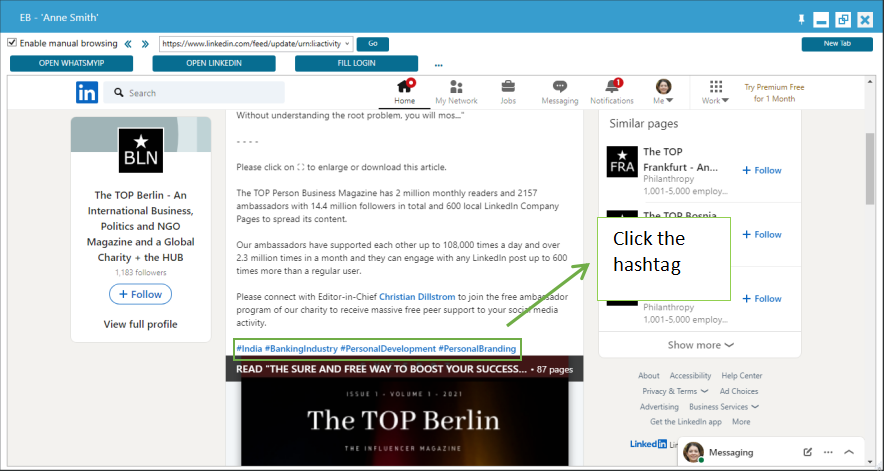
- Then, you can browse on to some articles and click see more to open the article and look for hashtags
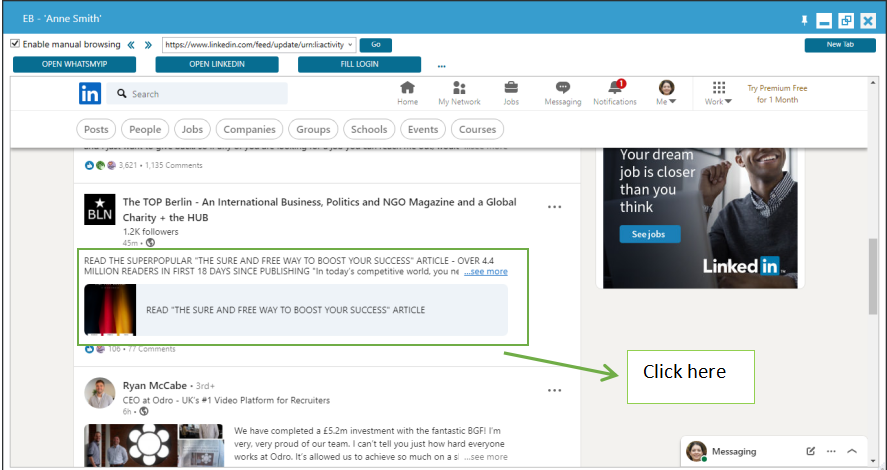
- Then click the hashtags
- Then click FOLLOW
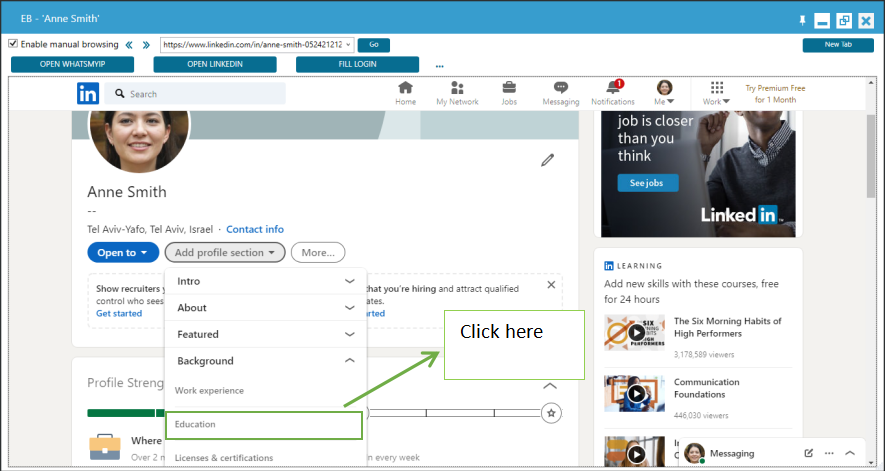
Editing the profile informations
- Start with work experience (title and job)


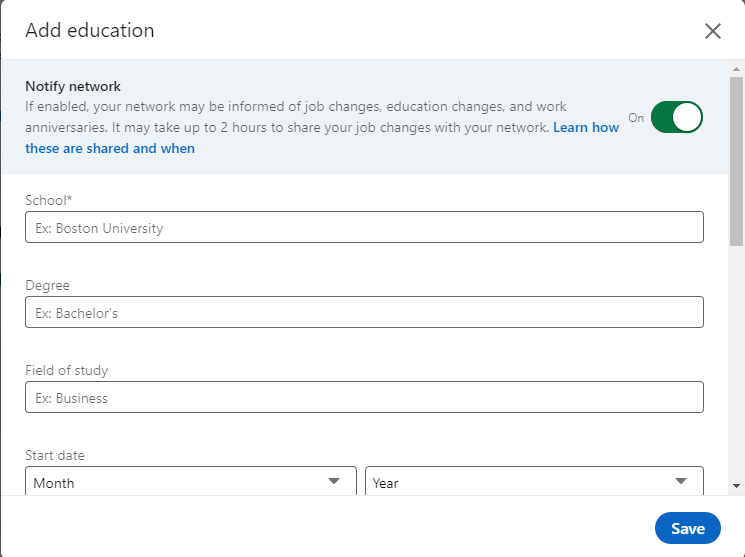
- Next is education
- Fill in all the information needed then click SAVE
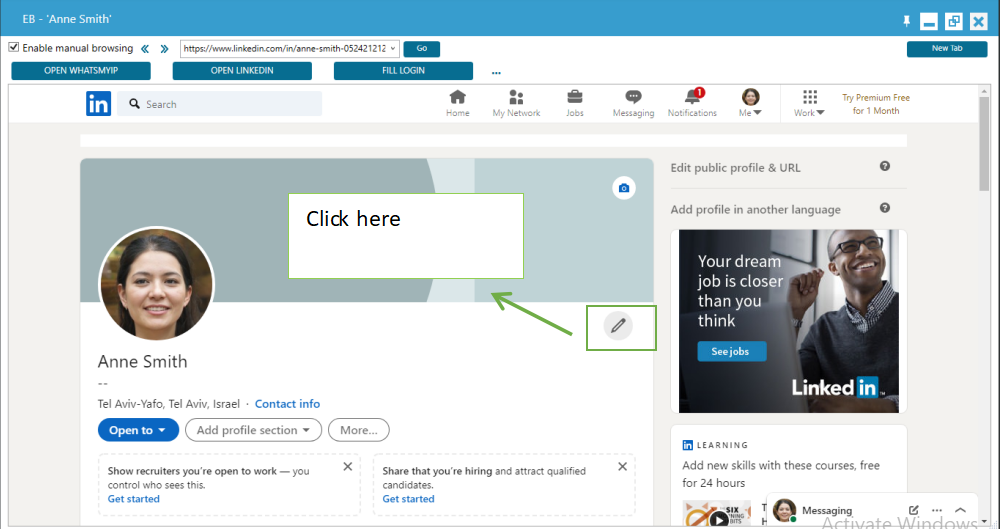
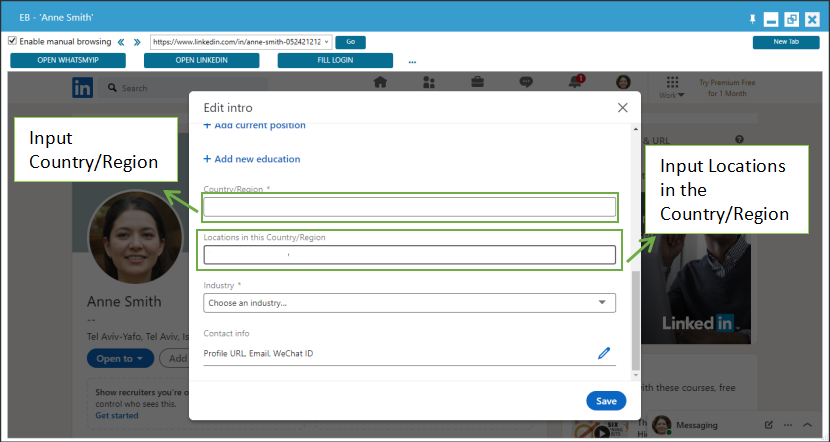
- For the location, click this icon
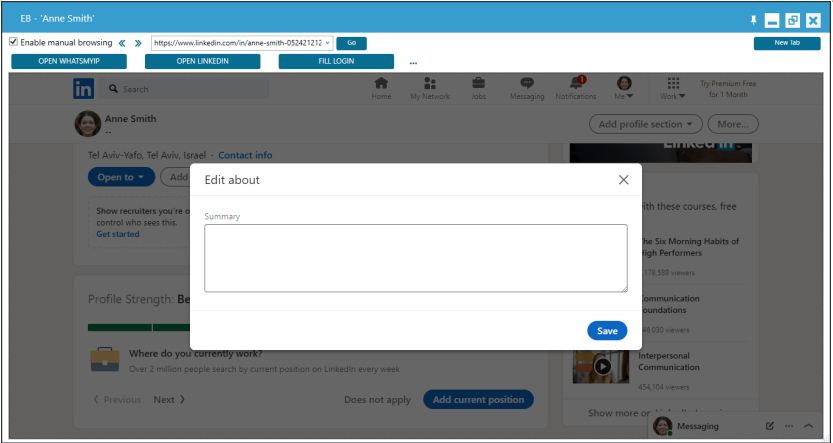
- You can also add summary to your account
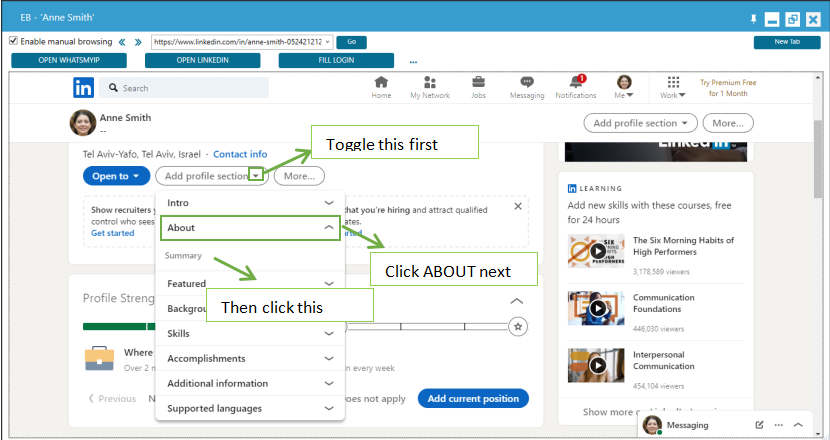
- Write your summary here then click save once finished.
After that you have to do RANDOM ACTIONS such as, more following of pages, joining more groups, sending more connection requests to people in the same niche as the account, starting conversations with people and posting on the wall.
LinkedIn is the ultimate social network for business professionals who want to make connections, remain connected with others in their industry, and continue to grow in their chosen fields. Having a LinkedIn avatar is a perfect way to expand your professional network.
This guide will walk you through everything you need to know to get started, including how to build a fantastic profile, make the right connections, use the platform effectively, and make your account stand out from the rest.
#linkedinavatar #jarvee #linkedinautomation #avatar #avatarcreation